Turn Any Photo into a Pixel-Perfect Crochet Pattern
Turn any photo into a pixel-perfect crochet pattern with AI. Step-by-step guide to photo prep, colour quantisation, grid sizing, and stitch modes.
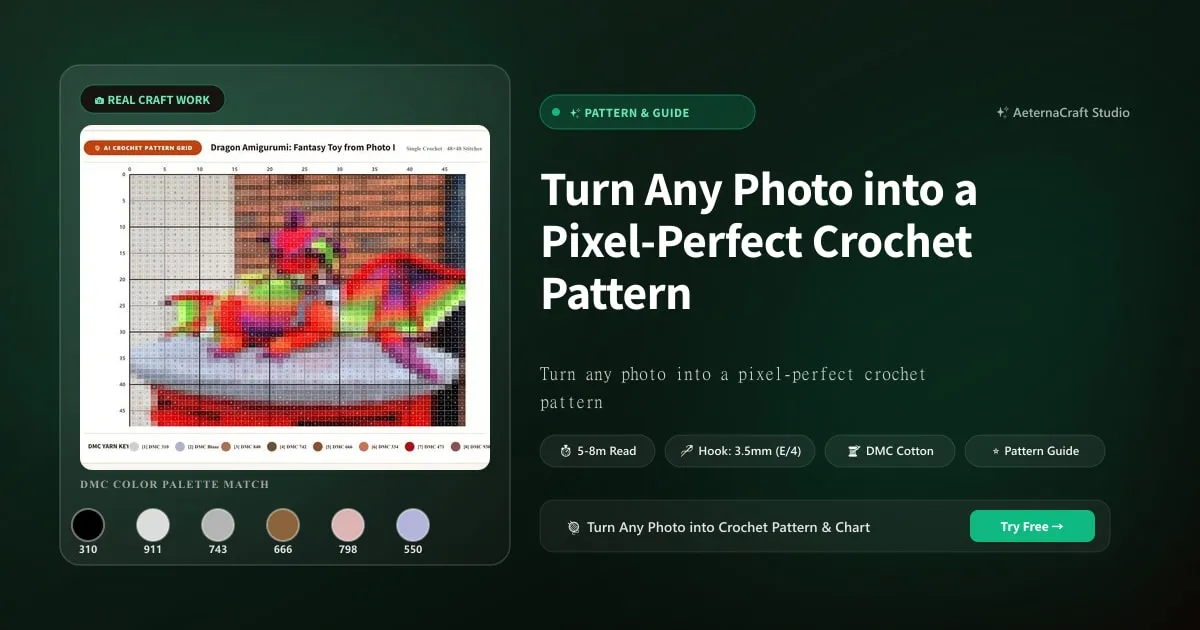
How to Turn Any Photo into a Pixel-Perfect Crochet Pattern
The idea of converting a cherished photograph into a hand-crocheted keepsake sounds like magic — but the process is surprisingly approachable once you understand the core principles. Whether you want to crochet a pet portrait, a landscape, or a wedding photo, the workflow is the same: photo → pixelated grid → row-by-row stitch chart → finished piece.
Why Photo-to-Crochet Is Different from Traditional Patterns
Traditional crochet patterns are hand-designed: a designer draws a chart, assigns colours, and writes instructions. This works for geometric motifs but fails for photographs, which contain hundreds of colours and subtle gradients.
Photo-to-crochet solves this by using colour quantisation — an algorithm that reduces the photo’s thousands of colours down to a manageable palette (typically 6–20 shades). Each colour is then mapped to a yarn shade, and the image is downsampled to a grid where each cell represents one stitch.
The result is a pixel-art version of your photo that can be crocheted stitch by stitch.
Step 1: Choose the Right Photo
Not all photos convert equally well. Here’s what makes a great source photo:
- Clear subject: A single subject (a face, a pet, a flower) produces a more recognisable pattern than a busy scene.
- Good lighting: Even, natural lighting preserves colour accuracy. Avoid harsh shadows or blown-out highlights.
- High contrast: The subject should stand out from the background. If your subject blends in, crop tighter.
- Simple background: A plain or blurred background reduces the colour count needed and keeps focus on the subject.
Step 2: Crop and Prepare
Before uploading, crop your photo to focus on the subject. A square or slightly rectangular crop works best for most crochet projects. If your finished piece will be a blanket (wider than tall), crop accordingly.
Step 3: Choose Your Grid Size
The grid size determines the level of detail and the project’s difficulty:
| Grid Size | Detail Level | Project Type | Time to Complete |
|---|---|---|---|
| 40×40 | Low | Mini ornaments, patches | 4–6 hours |
| 60×60 | Medium | Cushion covers, small wall art | 8–12 hours |
| 80×100 | Good | Pet portraits, medium blankets | 15–25 hours |
| 120×150 | High | Large blankets, detailed wall hangings | 40–60 hours |
Step 4: Select Your Colour Count
Fewer colours = simpler pattern but less detail. More colours = richer detail but more yarn management. Here’s a practical guide:
- 6 colours: Best for simple designs (flags, logos, silhouettes)
- 10 colours: Sweet spot for pet portraits and landscapes
- 14–16 colours: Detailed portraits with skin tones
- 20 colours: Maximum detail — use sparingly as colour management becomes complex
Step 5: Generate and Start Crocheting
Once you’ve uploaded your photo and chosen your settings, AeternaCraft Studio generates:
- A colour grid — a pixelated chart where each cell shows the yarn colour for that stitch
- A colour legend — mapping each colour to a yarn shade and hex code
- Row-by-row instructions — written directions for each row, listing colours and stitch counts
Download the PDF, gather your yarn, and start stitching. The grid tells you exactly what to do for every single stitch — no guesswork needed.
Real Example: From Photo to Finished Blanket
Check out our Gallery to see real photo-to-crochet transformations, including before-and-after comparisons of pet portraits, landscapes, and wearable art. Each case study includes the original photo, the generated grid, and the finished crochet piece.
Tips for Your First Photo-to-Crochet Project
- Start small: Try a 60×60 grid with 8 colours for your first project.
- Use C2C (corner-to-corner): This stitch mode creates a dense, woven texture that’s ideal for photo patterns.
- Buy extra yarn: Always purchase 15% more yarn than estimated to account for tension variations and colour changes.
- Print the grid in colour: A colour-coded chart is far easier to follow than a black-and-white version.
- Use bobbins: Wind small amounts of each colour onto bobbins to manage multiple colour changes without tangles.
Ready to turn your favourite photo into a crochet masterpiece? Try AeternaCraft Studio — your first pattern is free.
Frequently Asked Questions
Can I really turn any photo into a crochet pattern?
Yes — any photo can be converted into a pixelated crochet grid. The AI quantises the image into a limited colour palette, maps each colour to a yarn shade, and generates a row-by-row chart. Photos with clear subjects and good contrast produce the best results.
What photo resolution do I need for a good crochet pattern?
A photo of at least 500×500 pixels is sufficient. The AI downsamples the image to your chosen grid size (typically 60–150 stitches wide), so ultra-high-resolution photos don't improve the result. What matters more is lighting, contrast, and having a clear subject.
How long does it take to generate a photo-to-crochet pattern?
With AeternaCraft Studio, pattern generation takes under 10 seconds. Upload your photo, choose your grid size and colour count, and the AI produces a complete grid, colour legend, and row-by-row instructions instantly.
Related Posts
Photo to Crochet for Beginners: First Pattern Guide
New to photo-to-crochet? This beginner-friendly guide walks you through your first pattern — from choosing a photo to finishing your project.
ToolsPhoto-to-Crochet Pattern Mistakes: Common Fixes
Avoid the 10 most common photo-to-crochet pattern mistakes. Learn to prevent tension issues, colour confusion, grid miscounts, and finishing errors.
Try Our Free Crochet Tools
Turn Your Photo Into a Crochet Pattern
Upload any photo and our AI generates a pixel-perfect crochet pattern with real yarn color matching in seconds.
Try AeternaCraft Studio Free →Calculate Yarn for Any Resize
Free amigurumi yarn & resizing calculator. Change hook, switch yarn, or scale a whole pattern — instant results with PDF export.
Open the Calculator →