First Sweater: Fix Fit Issues & Conquer Steek Fear
Learn from common first sweater mistakes: tight necklines, skipped swatches, and steeking anxiety. Tips for perfect fit and finishing.
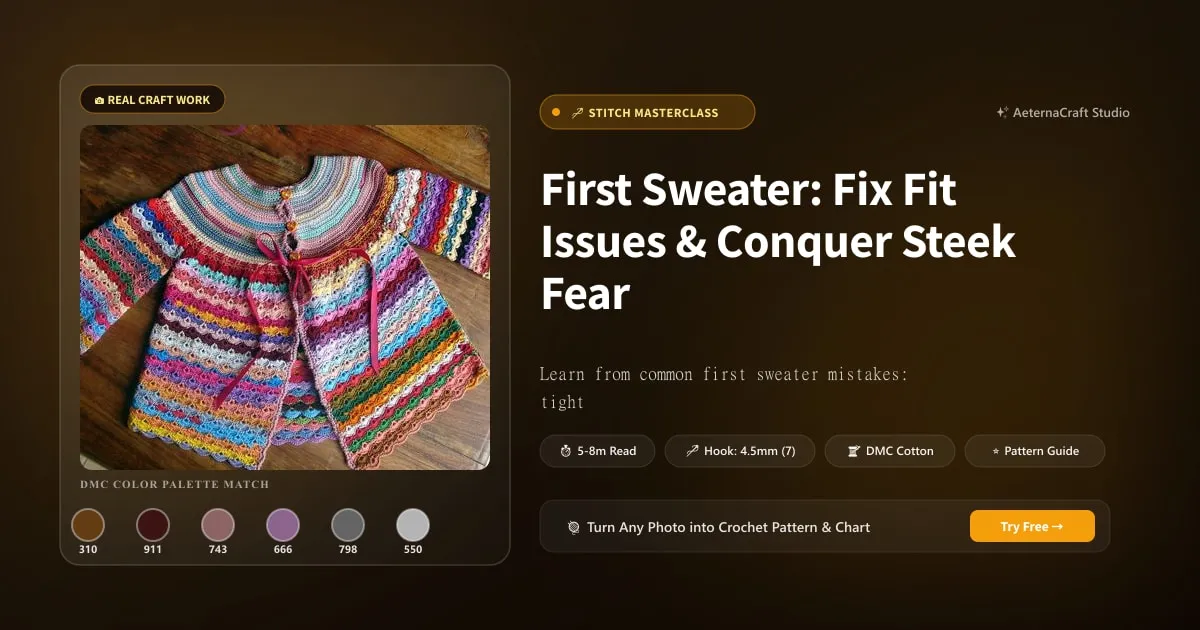
Let’s pour some tea and talk about the sneaky little habit that has ruined more finished objects than dropped stitches ever could: skipping the swatch. I’ve been pulling yarn through loops for over two decades, and I still catch myself reaching for the needle or hook without testing gauge when the pattern looks deceptively simple. Here’s the truth, spoken from decades of frogging and sighing: a pattern that simply says “work to 65 cm” or “measure from underarm to hem” is lying to you, or at least assuming you’re spinning yarn from your own fingertips. Vintage designs and modern measured-length patterns rely entirely on gauge because yarn behaves unpredictably. Swap a traditional worsted wool for a slippery silk blend, or trade your usual 4.0mm hook for a 3.5mm bamboo one, and suddenly that cozy pullover is draping like a beach tent.
I learned this the hard way when a community member posted about a jumper that came out nearly four inches wider than intended. They’d followed every instruction perfectly, but they’d never tested how the cotton-acrylic mix bloomed after washing. Once that fabric relaxes, width balloons. Stranded colorwork makes it worse because carrying floats creates natural tension resistance. If you’re working a two-color motif over a 40-stitch foundation, you need to test that tension. Cast on double your pattern repeat, work at least 15 rows in the round, wash it exactly how you plan to finish the garment, dry it flat, and measure. If your swatch measures 22 stitches across 10 cm but the pattern calls for 24, you’re looking at a 10% width discrepancy. Multiply that across a 90-stitch chest, and your sweater is suddenly wearing its arms in the torso.
Why Swatching Matters (Even for Measured-Length Patterns)
The Gauge Trap in Vintage Patterns
My approach to swatching changed after I ruined a beautiful fair isle cardigan. The pattern said “work to 45 cm from underarm,” and I thought I was safe. I wasn’t. The yarn was a DK weight merino-cotton blend, and my tension was looser than the designer’s. The finished sweater hung like a sack. I remember sitting on my couch, holding this lump of fabric, and feeling so frustrated. The trick is to always swatch in the round if your garment is worked in the round. Floats behave differently on the back of a flat swatch than they do in a tube. Cast on 30 stitches, join in the round, work 20 rows, and measure the center. That number is your real gauge.
How to Fix an Oversized Sweater After Knitting
So you’ve finished the piece, tried it on, and it looks like a tent designed for a bear. What now? Panic is optional; restructuring is mandatory. First, try aggressive blocking. Lay the sweater flat, mist it with water, and pin the edges back to your original measurements. Wool and alpaca forgive mistakes beautifully—they bloom and settle. But if you’re working with acrylic or mercerized cotton, heat and moisture won’t shrink fabric permanently; they just rearrange fibers temporarily.
If blocking barely moves the needle, consider adding side seams. I’ve picked up loose yarn along the underarm curves, threaded it through a tapestry needle, and sewn a tapered seam to bring the width in by 2 to 3 centimeters per side. It’s surprisingly invisible once blocked. You can also insert diamond-shaped gussets or simply restitch the armholes tighter. Honestly, there’s a point where modification stops being clever and starts being exhausting. If the garment is five inches too wide overall, re-knit the body or donate the yarn to someone whose gauge matches yours. I once spent three weeks seam-picking a bulky acrylic pullover that refused to cooperate. My fingers were raw, my patience was thinner, and I finally learned to just rip it back to the yoke and start over. Trust me, starting with a proper swatch saves you from becoming a part-time seamstress.
Steeking Without Fear: A Beginner’s Guide
Choosing the Right Reinforcement Method
Steek gets a reputation for terrifying beginners, but honestly, it’s just yarn behaving predictably while you behave skeptically. The idea of cutting open a fully constructed tube sounds like a nightmare until you realize we’re reinforcing the cut zone first. I’ve experimented with three main approaches: crochet reinforcement, machine sewing, and hand sewing. Each has merits, but let’s be real—my first steek attempt involved a 3.5mm hook and a row of single crochet (sc) worked evenly across the center back. I love it because it’s secure, leaves zero machine noise, and gives me tactile control. When I work sc along a 5-centimeter steek band, I’m essentially braiding the live stitches together so they refuse to unravel.
Machine sewing works wonderfully if your sewing box is organized and your foot pedal remembers how to function. I haven’t touched my vintage Bernina since 2019, and the first time I sat down to topstitch a steek, I jumped every time the presser foot dropped. It’s a valid fear. Hand sewing is the safest if you value quiet over speed, but threading a needle through sixty-plus live stitches can take longer than I have in a single evening. Whichever method you choose, reinforce a full 4 to 6 centimeters centered on your cut line. I always pin the reinforcement band with rust-proof straight pins before committing, then work hdc or tr if I want extra bulk hiding the edge. The goal isn’t perfection; it’s security. Your fabric should hold firm when you tug it. If it wobbles, reinforce again.
Cutting Your Steek
When you finally pick up those scissors, treat the moment like you’re opening a fragile parcel. Use sharp embroidery scissors or micro-tip shears—dull blades will snag and distort the reinforcement. Press the steek area thoroughly so the fibers lie flat. Mark your cut line with a fabric chalk or a wax pencil, then cut slowly right between your two reinforcement rows. Pivot at the corners if you’re shaping an armhole or neckline, but never rush. If you cut slightly outside the lines, don’t spiral into panic. Weave the excess edge into the next row, pick up stitches carefully, and let the seam allowance hide the imperfection. I once sliced halfway through my reinforcement band on a winter cardigan. I spent forty minutes picking up stitches with an H/8 hook, working sl st to anchor the new edge, and binding off loosely. It held. It still holds. Sometimes a crooked cut just becomes a design feature you pretend was intentional.
Fixing a Tight Neckline (Without Unraveling Everything)
Blocking and Stretching Techniques
Nothing says “summer sweater in January” like a neckline that eats your chin. Before you threaten to frog the entire yoke, grab a blocking board and some warm water. Wet blocking gives you the most control. Submerge the neckline section, roll it in a clean towel to remove excess moisture, then pin it outward to your desired width. Use blocking wires for straight edges or heavy-duty U-pins for curves. Pull gently and evenly—wool and silk blend nicely to permanent stretch, but pure cotton or mercerized fiber can distort if you overwork it. I usually add 2 to 3 centimeters of ease around the circumference and let it dry completely under light pressure. If you’re working with a dense colorwork yoke, check the stretch recovery after drying. Some fibers spring back; others stay forgiving.
Adding a Neckband or Facing
Sometimes blocking just isn’t enough. If your neckline still hugs like a corset, introduce an afterthought neckband. Turn the sweater inside out, pick up stitches evenly around the neck edge using a 4.0mm hook, and work two or three rows in dc or hdc. Bind off loosely with an H/8 hook, or leave the edge open and fold it inward to create a clean casing. This adds immediate comfort without touching the original construction. Alternatively, sew a facing. Cut a strip of lightweight cotton, mercerized blend, or even silk for drape. Match the curvature of your neckline, stitch it to the inside with a narrow seam, and turn it under. The facing hides raw edges, distributes tension across a wider area, and looks professionally finished. Years ago I made the mistake of using a single-cotton yarn for a fair isle pullover without accounting for how tightly the floats would pull. The neckline bit like a hawk. The facing saved it, and honestly, it looked better than the original edge ever did.
Blocking on the Go: Tips for Movers
Blocking Before or After Moving?
Relocating is stressful enough without worrying about a half-finished sweater crushing under your luggage. Should you block before you leave or wait until you’re settled? Wet blocking right before a move is risky because the fibers can shift or crease in transit. Steam blocking offers a compromise: press the garment lightly, reshape the curves, and let it cool flat before packing. If you must ship or carry the piece, lay it completely dry, fold it along natural seams, and slide it into a garment bag or rigid box. Tuck acid-free tissue paper between every fold to prevent sharp creases, and roll the sweater loosely rather than pressing it flat under heavy blankets. I always wrap alpaca or bulky wool pieces in cotton muslin first—it breathes better than plastic and keeps dust out.
Shaping the Yoke After Blocking
Once you’ve arrived, use blocking to finalize the silhouette. Pin the bottom curve of the yoke to open it slightly, especially if the original shaping felt too rounded or restrictive. Steam the armhole curves gently to encourage a graceful sweep, then pin to dry. If you’re working with a stretchy fiber like wool or mercerized cotton, you can manipulate the drape by tugging the lower edge outward while damp, then securing it with pins. Acrylic will set instantly with heat, so use a steam iron on a low setting and keep it moving. I usually measure 2 to 3 centimeters of additional ease around the underarm curve before pinning. Let it dry completely, remove the pins, and you’ll have a yoke that follows your body instead of fighting it.
Colorwork Fit: Adjusting for Body Shape
Why Colorwork Sweaters Often Fit Differently
Stranded colorwork is dense, stiff, and utterly unforgiving. The carried strands create internal friction that reduces stretch, which means a sweater that fits perfectly in stockinette can feel painfully snug once you introduce five contrasting colors. I’ve seen beautiful garments pulled inward at the chest and shoulders because the knitter didn’t account for that lost elasticity. If your colorwork sweater feels like a structured vest instead of a relaxed layer, you’re not imagining things. Add ease deliberately. A common community post highlighted a jumper that measured wider than the pattern dictated but still fit comfortably because the wearer prioritized relaxed drape over precision. That’s smart dressing. When working DK or worsted weight yarn, I usually increase the stitch count by 5 to 8 percent in the chest and ribbing zones. For fingering weight, the adjustment shrinks to 3 to 4 percent, but the principle stays the same.
How to Modify Yoke Depth and Body Length
Adjusting yoke depth requires patience and pattern math. Most colorwork motifs repeat over fixed row counts—often 12, 16, or 20 rows. If you want to extend the yoke, add full repeats rather than stretching partial rows. Count your decreases, pause at a clean motif boundary, work another complete repeat, then resume. To shorten it, stop decreasing a repeat early and transition to the body with plain stockinette or a simple rib. For body length, simply knit additional rows in your chosen stitch pattern. If you’re switching from colorwork to plain stockinette, maintain the same hook or needle size to keep tension consistent. I often work the lower body in DK or bulky weight for warmth, then finish with a 3-row dc border worked with a 3.5mm hook to anchor the hem. Try the sweater on over clothes you actually intend to wear underneath. Measure the gap between your chest and the fabric. That measurement tells you whether to adjust next time, or whether to celebrate a perfectly imperfect fit.
Honestly, finishing your first sweater is a proud moment, even if it’s not perfect. I remember holding my first completed garment—a lumpy, uneven thing with a neckline that barely fit over my head—and feeling like I’d conquered a mountain. The mistakes taught me more than any pattern ever could. So swatch, steek with confidence, and don’t be afraid to rip back. Your second sweater will be better, and your third will be a joy to wear.
Frequently Asked Questions
How do I fix a sweater that is too wide after knitting?
First, try aggressive wet blocking with pins to reshape the fabric. If that doesn't work, add side seams by picking up yarn along the underarm curves and sewing a tapered seam to bring the width in by 2 to 3 centimeters per side. For severe sizing issues, it's often better to rip back to the yoke and re-knit with a proper gauge swatch.
What is the best reinforcement method for a beginner steek?
Crochet reinforcement is the most beginner-friendly. Use a 3.5mm hook to work a row of single crochet (sc) evenly across a 5-centimeter band centered on your cut line. This braids the live stitches together so they won't unravel. Machine sewing works too, but hand sewing is safest if you value quiet over speed.
How can I fix a tight neckline without unraveling the whole sweater?
Start with wet blocking: submerge the neckline, roll it in a towel, and pin it outward to your desired width, adding 2 to 3 centimeters of ease. If that's not enough, add an afterthought neckband by picking up stitches around the neck edge with a 4.0mm hook and working two or three rows of double crochet (dc) or half double crochet (hdc). Bind off loosely.
Related Posts
Mastering Colorwork and Steeks: 7 Lessons from a Sweater
Learn all-over colorwork, steeking, and pattern modifications from a challenging sweater project. Tips for fearless knitting.
AdvancedHow to Knit a Custom Vest: 12 Steps to Perfect Fit
Learn to knit your own colorful vests without a formal pattern. Tips on yarn choices, color combos, and customizing fit for any body.
Try Our Free Crochet Tools
Turn Your Photo Into a Crochet Pattern
Upload any photo and our AI generates a pixel-perfect crochet pattern with real yarn color matching in seconds.
Try AeternaCraft Studio Free →Calculate Yarn for Any Resize
Free amigurumi yarn & resizing calculator. Change hook, switch yarn, or scale a whole pattern — instant results with PDF export.
Open the Calculator →