How to Knit a Custom Vest: 12 Steps to Perfect Fit
Learn to knit your own colorful vests without a formal pattern. Tips on yarn choices, color combos, and customizing fit for any body.
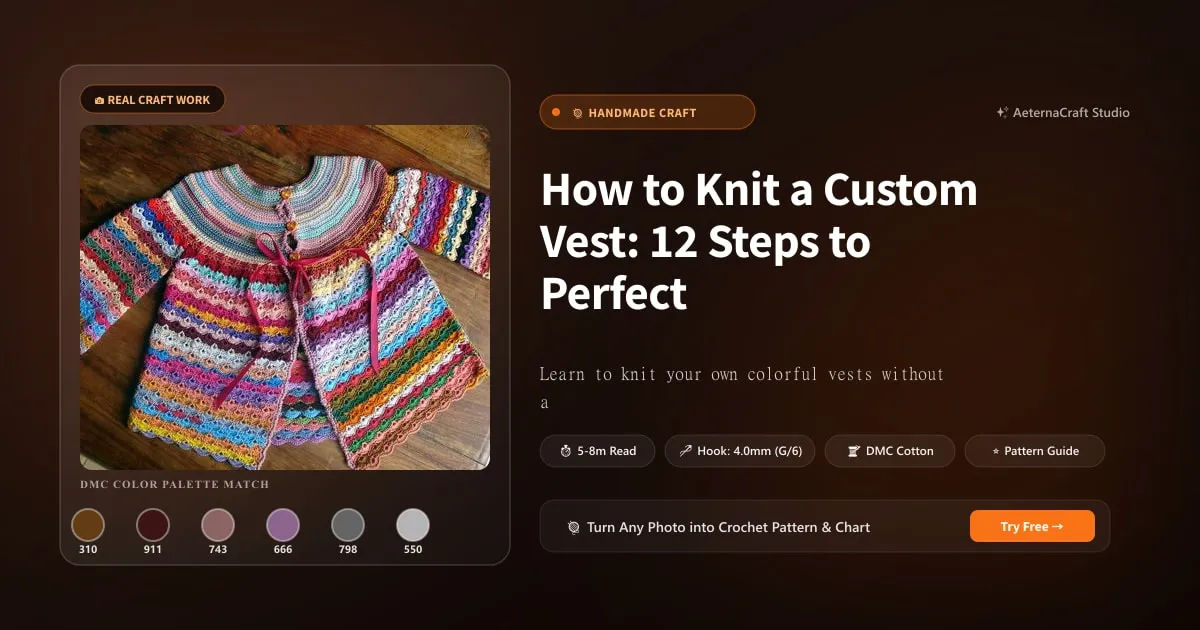
I’ve been twisting loops of fiber for over twenty years, and my hands have spent countless hours gripping everything from a tiny 3.5mm hook to a chunky H/8 for heavy blankets. Regardless of whether I’m working sc, dc, hdc, tr, or sl st on a project, garment construction always starts with the same unglamorous truth: your tape measure doesn’t lie, and neither does your body. Measuring yourself properly saves you from unraveling thirty hours of labor because the armhole decided to swallow your elbow. Grab a soft measuring tape and a piece of string. Stand naturally in front of a mirror. Measure around the fullest part of your bust, then down to your natural waist, and finally around your hips at the widest point. Don’t suck in your stomach; we’re building clothes for real life, not mannequins. Next, measure armhole depth. I hang a lightweight cardigan over a sturdy chair back, mark where the underarm seam sits on my ribcage, and measure straight down to that mark. That number becomes your guide.
When designing a vest, ease is your best friend, but too much turns you into a walking tent. Here’s what I’ve learned works reliably across different silhouettes:
| Body Area | Minimal Ease | Comfort Ease | Relaxed Ease |
|---|---|---|---|
| Bust/Chest | 0–1 inch | 2–3 inches | 4–5 inches |
| Waist | 0 inch | 1–2 inches | 3+ inches |
| Hips | 0 inch | 1–2 inches | 2–3 inches |
Honestly, I used to ignore the waist completely. Years ago I knitted a vest with straight sides because I figured the drape would handle itself. It didn’t. It hung like a dropped shoulder bag and made me look three sizes larger than I am. Thankfully, I learned to grade from bust to hip, even if the difference is subtle. A little taper changes everything.
Creating a Simple Schematic
You don’t need architectural degrees to sketch a vest. I grab graph paper, a pencil, and a ruler. Draw a rectangle for the back panel. Mark your bust width, waist width, and hip width. Connect those points with gentle curves or straight lines depending on your desired silhouette. The front panel mirrors the back, minus any neckline shaping. Above the bust line, draw the armhole curve dropping down to your measured depth. Add seam allowances if you’re sewing flat pieces, or leave them off if you’ll seaming after. My favorite trick? Lightly trace your favorite store-bought vest onto cardboard, cut it out, and lay it over my sketch. It’s surprisingly grounding when your brain starts imagining magical proportions.
People often stare at the paper like it’s written in runes. Why not? Turning body curves into flat rectangles feels counterintuitive until you realize knitting loves geometry. I treat every schematic like a map. Once the lines meet, I know exactly where my stitches need to live.
Calculating Stitch and Row Counts
This is where the magic happens, and also where most beginners panic. You cannot skip the swatch. Seriously. I’ve wasted more worsted weight on misguided assumptions than I care to admit. Grab the yarn you intend to use and your planned needle size—usually a US 6 or 7 (4.0mm to 4.5mm) for DK, or a US 8 for bulky. Cast on twenty stitches, knit a square at least six inches wide, wash it, block it, and measure. Count your stitches and rows over four central inches. Divide to get your gauge. If your swatch reads 5.5 stitches per inch, and your bust measures forty-two inches, multiply 42 by 5.5. You need roughly 231 stitches for the circumference. Split that between front and back, so about 115 stitches each. Subtract four for side seams if working flat.
For armhole shaping, I rely on a simple math rhythm. Measure the depth in inches, convert to rows using your row gauge, then divide by two. That’s your baseline. Decrease one stitch every other row for a standard tapered armhole. If you want a drop shoulder, skip the armhole decreases entirely and let the fabric fall straight. I personally love a slightly curved underarm because it sits cleaner under layers.
Still wondering how to adjust for fiber stretch? Remember that wool and alpaca forgive more than cotton or mercerized blends. Elastic fibers compress during blocking; inelastic fibers hold their exact post-wash dimensions. When I first tried translating a bulky yarn chart into a precise vest pattern, my rows ballooned and the garment turned into a parachute. I learned to tighten my row gauge by switching to a smaller needle, then rechecked. Honestly, calculating stitch counts feels like solving a puzzle where every piece snaps into place once you respect the numbers.
Selecting Yarn and Colors for Impact
Yarn Blend Considerations
Choosing yarn for a vest is essentially choosing your armor. You want something that stands up to movement, resists pilling, and feels pleasant against your skin for hours. My go-to for structured yet cozy vests is a wool/acrylic blend. Wool gives that wonderful memory and elasticity, meaning the garment bounces back after you squeeze through a crowded doorway. Acrylic adds durability and makes washing far less stressful. I frequently reach for DK weight blends for spring layers and worsted weight for everyday wear. Fingering yarn works beautifully if you want a lightweight, breathable piece you can layer under coats. Bulky yarn gets dramatic fast, but it demands sharp color choices because every stitch shows up loudly.
Fiber matters just as much as weight. Cotton drapes cool and crisp, which I love for summer garden vests, but it lacks stretch and can sag over time. Mercerized cotton has that gorgeous sheen and tighter twist, making it resist friction beautifully. Alpaca is impossibly soft and warm, though it can grow heavy if you’re not careful with tension. Silk adds luminosity and strength, perfect for blending into wools to elevate a basic palette. I keep a small drawer of stash scraps labeled by fiber content so I never guess on the fly. When I started experimenting with pure acrylic for a daily commuter vest, I was pleasantly surprised by how well it held its shape, though I missed the natural loft of wool. Thankfully, modern acrylics have closed that gap significantly.
Color Theory for Knitters
Color doesn’t have to be intimidating. I treat it like cooking: start with basics, taste as you go, and adjust to your palate. Complementary colors sit opposite each other on the wheel. Pair a deep emerald with a rusty terracotta, or a navy with a muted gold. Analogous colors sit next to each other. Think sage, olive, and moss green. They harmonize effortlessly and rarely clash. Jewel tones—amethyst, sapphire, ruby, emerald—lend themselves beautifully to vests because they read rich without overwhelming. Pastels work wonderfully for airy, spring-ready pieces, especially when paired with crisp white or soft gray.
I used to throw random skeins together and pray for harmony. It didn’t work. My first color-blocked vest ended up looking like a traffic cone had a disagreement with a lemonade stand. Now I lay three skeins side by side on a neutral table, step back, and breathe. Does one scream louder than the others? Does the combination make me feel calm or alert? I trust that gut reaction. Color should support the wearer, not fight them.
Planning Color Placement
Stripe sequences require patience. I count my rows meticulously when alternating colors, because one missed stitch throws off the entire rhythm. For color blocking, I divide the vest into vertical panels: front, back, side bands, and sometimes yoke sections. I calculate exactly how many stitches each panel needs before casting on. Random striping sounds whimsical until you realize your variegated yarn might pool into ugly dark blobs at the waist. To prevent pooling, I switch to a solid contrast color every few yards, or I twist the strands intentionally while carrying multiple colors along the inside. Some knitters prefer to knit in the round for continuous stripes, while I usually work flat panels and seam them later. It’s slower, but I can control tension better and fix mistakes without unraveling three inches of progress.
Have you ever bought a beautiful ombre skein only to watch it turn muddy around the elbow? I have. Too many times. Now I test placement by knitting a six-inch strip of the exact pattern I plan to use. If the color transition lands awkwardly, I swap yarns before committing. Planning color placement isn’t about restricting creativity; it’s about giving your design breathing room.
Knitting Your Vest: Step-by-Step Construction
Casting On and Knitting the Lower Body
I start every vest with a long-tail cast-on because it stretches beautifully and won’t constrict the hem. Some nights I reach for a tubular cast-on when I want that polished, professional edge, though it does take extra patience. I usually knit flat for the main body panels unless I’m crafting a sleeveless tank-style vest where seamless construction makes sense. Once the cast-on sits comfortably on my needles, I establish a ribbed hem: three rounds of knit-one, purl-one for DK weight, or knit-two, purl-two for worsted. The rib should finish at your desired waist length, typically eight to ten inches for a hip-grazing vest. If I want waist shaping, I work short-row wraps or subtle decrease rows every few inches. I dislike aggressive tapering because it fights my posture. Gentle grading looks cleaner.
Knitting flat means I’ll eventually seam the sides, which I actually prefer. Seaming allows me to match stripes perfectly and hide color changes neatly. I knit each panel until it reaches the underarm measurement, then set it aside on a stitch holder. Two identical panels mean twice the confidence when assembly begins.
Shaping the Armholes and Neckline
Armhole shaping follows a predictable rhythm. At the side edge, I bind off four to six stitches, then decrease one stitch on every right-side row for roughly an inch. This creates a gentle slope that follows my torso without digging in. For deeper armholes, I continue decreasing every other row until I hit the target depth. Neckline shaping depends on my mood and the season. A scoop neck requires I bind off the center stitches and work each shoulder separately, decreasing one stitch at the neckline edge every other row. A V-neck demands I pick up the center stitch after binding off an odd number, then decrease on both sides symmetrically. I practice my V-neck decreases on scrap yarn first. Getting the angle wrong makes the neckline gape or twist, and nothing ruins a well-finished vest faster than a neckline that refuses to behave.
Shoulders usually remain straight. I bind off evenly across the top, leaving enough fabric to attach sleeves if I ever change my mind. Most vests stay sleeveless, and I’m perfectly happy with that. The shoulder line should sit right at the bone, not slide down toward the elbow.
Finishing the Edges and Shoulder Seams
Finishing separates the amateurs from the crafters. I always block my panels before joining them. Wet blocking relaxes the fibers and evens out minor tension inconsistencies. I pin each piece to the correct measurements, let it dry completely, and press lightly with an iron if the fiber allows. Mattress stitch is my absolute favorite for side seams. I align the right sides, insert the needle through the edge loops alternately, and pull gently. The seam disappears. No bumps. No bulk. Just clean lines. For shoulders, I sew them together first, then finish the edges.
Picking up stitches around armholes and necklines requires steady hands. I insert the needle under both legs of each edge stitch, working evenly across curves. Too many stitches cause bubbling; too few causes pulling. I usually knit a ribbed edging or applied I-cord around the openings to stabilize them. I-cord might sound advanced, but it’s just knitting and purling in a tight tube. I chain it on separately and sew it down, or I knit it directly onto the edge. Either way, it frames the garment like a picture mat. I love seeing a vest come together during finishing. There’s something deeply satisfying about watching raw edges transform into a wearable object.
Troubleshooting Common Fit Issues
Vest Too Loose or Too Tight
If your finished vest hangs loosely, check your gauge first. Did you use larger needles than planned? Are you knitting a relaxed ease when you wanted minimal? I’ve made this mistake more than once, usually because I got comfortable and stopped counting rows. Subtract stitches evenly across the round or across each panel, then resew. If it’s too tight, you can add gussets under the arms or carefully seam in narrow fabric strips. I prefer to rip back and recalculate rather than patch desperately. Measure again after blocking. Wrinkled, unblocked fabric lies badly on your body. Laid flat and pinned true, it tells the real story. Keep a quick checklist: bust measurement matches schematic? Armhole depth aligns with cardigan benchmark? Side seams hang straight? If all three check out, the foundation is solid.
Armholes Gap or Pull
Gapping armholes usually mean the curve sits too low or the decrease rate is too gradual. I adjust by increasing the frequency of decreases near the underarm. Pick up fewer stitches along the curve, or work shorter rows to shape the dip more aggressively. Pulling happens when the armhole is too shallow or the shoulder slope conflicts with your posture. I solve this by adding a subtle raglan-style slip stitch accent or gently widening the side seams. Sometimes a stitch holder during trying-on sessions saves the day. I clip the side seams temporarily, adjust the angle, and let the fabric settle. You’d be amazed how much a quarter-inch shift changes comfort.
Neckline Not Laying Flat
A gappy or rolled neckline drives me crazy. I fix it by switching to a smaller needle for the neckband, picking up stitches more consistently along curves, or changing my bind-off technique. A sewn bind-off creates stretch that mimics knitting, which prevents gaping. Short rows work wonders for deep necklines because they build height gradually without stretching the fabric thin. I also recommend testing the neckline drape before finishing. Pin a temporary band, try it on, and adjust tension. Small tweaks save hours of reworking. I’ve spent evenings undoing neckbands out of frustration, only to realize I just picked up stitches too tightly. Patience pays off.
Building a Collection: Variations and Inspiration
Experimenting with Different Colorways
Once you nail one silhouette, repeating it with new palettes builds a cohesive wardrobe. I keep a dedicated notebook for color combinations. I sketch mini swatches, note the yarn brands, and record how the colors look under natural light versus indoor bulbs. A dark charcoal vest transforms completely when I swap merino for a silk-blend worsted. I experiment with seasonal shifts: earthy rusts and olives for autumn, bright corals and sky blues for summer. The structure stays familiar, but the mood changes entirely. You’ll notice your style evolving, and suddenly you own pieces that speak to each other.
Adding Texture and Details
Basic stockinette is reliable, but texture brings personality. I add simple seed stitch panels along the sides, or work a modest cable braid down the center back. Lace inserts between solid panels create breathability without sacrificing warmth. I reference stitch pattern libraries when I want fresh ideas, but I always test them on scrap first. A cable that looks elegant in photos can become a thick, uncomfortable ridge in real life. I keep modifications subtle. A vest should move with you, not restrict you. Stripes, color blocks, and textured ribbing all work beautifully when balanced against clean lines.
Documenting Your Process
I photograph every finished vest immediately after blocking. Front, back, detail shots, and a close-up of the label. I record the exact needle sizes, stitch counts, yarn yardage, and washing method. This documentation saves me from reinventing the wheel. When I inevitably misplace a swatch or forget how I shaped a particular neckline, my notes rescue me. I measure each piece flat, note the armhole depth, and track how it ages after repeated wear. Some sweaters pill quickly. Others soften beautifully over months. Recording those observations turns hobby into craft. I feel genuinely proud when I pull up a photo from three years ago and recognize the silhouette instantly. Designing your own vests isn’t just about wearing something unique. It’s about understanding how fiber, math, and patience intersect. I’ll keep tweaking, measuring, and swatching because every vest teaches me something new.
Frequently Asked Questions
How do I calculate stitch counts for a custom vest without a pattern?
Knit a swatch at least 6 inches square, wash and block it, then count stitches per inch over 4 central inches. Multiply your bust measurement by that stitch gauge. For example, if your gauge is 5.5 stitches per inch and your bust is 42 inches, you need 231 stitches total. Split that between front and back panels, subtracting 4 stitches for side seams if working flat.
What's the best yarn for a structured vest that won't sag?
A wool/acrylic blend works best for structured vests. Wool provides memory and elasticity so the garment bounces back after wear, while acrylic adds durability and easy washing. For lightweight vests, use DK weight; for everyday wear, worsted weight. Avoid pure cotton if you want structure, as it lacks stretch and can sag over time.
How do I fix a neckline that won't lay flat on my vest?
Switch to a smaller needle for the neckband, pick up stitches more consistently along curves, or use a sewn bind-off for stretch. Short rows can help build height gradually for deep necklines without stretching the fabric. Always test the neckline drape by pinning a temporary band and trying it on before finishing.
Related Posts
Mastering Colorwork and Steeks: 7 Lessons from a Sweater
Learn all-over colorwork, steeking, and pattern modifications from a challenging sweater project. Tips for fearless knitting.
AdvancedHow to Crochet a Monarch Butterfly Cardigan: Tips & Patterns
Learn to crochet a stunning monarch butterfly cardigan with pattern recommendations, color tips, and assembly tricks for this popular project.
Try Our Free Crochet Tools
Turn Your Photo Into a Crochet Pattern
Upload any photo and our AI generates a pixel-perfect crochet pattern with real yarn color matching in seconds.
Try AeternaCraft Studio Free →Calculate Yarn for Any Resize
Free amigurumi yarn & resizing calculator. Change hook, switch yarn, or scale a whole pattern — instant results with PDF export.
Open the Calculator →