How to Knit a Birthday Hoodie: 7 Custom Sweater Tips
Learn from a viral Reddit post on knitting a birthday hoodie. Get tips on pattern selection, sizing, yarn choices, and finishing techniques for a perfect fit.
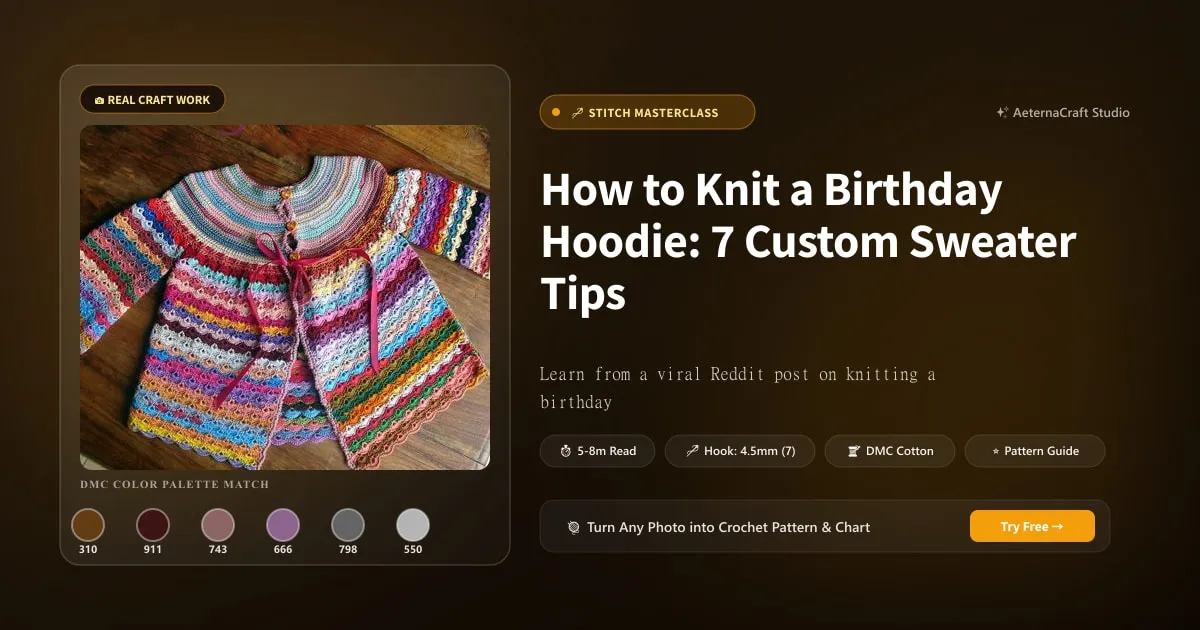
There’s something deeply satisfying about slipping a soft, handmade garment onto a little one. When that viral Reddit thread popped up on my feed last month, I couldn’t look away. The original poster had spent three weeks knitting a birthday hoodie for their niece, complete with mismatched color blocks and a slightly lopsided hood, and the comments were flooded with tears of nostalgia and admiration. It reminded me exactly why I picked up my first pair of knitting needles back in 1998. Handmade gifts aren’t just fabric; they’re time, attention, and a whole lot of love stitched into every row. Honestly, when I first tried teaching myself to knit a pullover in my early twenties, I ended up with a sweater that fit a golden retriever perfectly but left me feeling like I’d accidentally designed a potato sack. Thankfully, decades of trial and error have taught me how to build something that actually fits a growing child, and I’m thrilled to share that hard-won wisdom with you over what I hope is a steaming cup of chamomile tea.
But before you dive into a skein stash, you need to pick a pattern that won’t drive you mad. A great hoodie pattern balances structure with stretch, and it should account for the fact that children grow faster than I can cast off. Raglan sleeves are my go-to for young kids because they eliminate side seams that constantly split open, and they grow beautifully from the neckline down. Set-in sleeves offer a cleaner, more tailored silhouette, which I prefer for older tweens who want something that actually looks like the store-bought ones they covet. Hood styles vary wildly, too. Some patterns use a simple gusseted design that lays flat, while others go for a bulky, cowl-like wrap that’s adorable until your toddler tries to climb a jungle gym. Don’t forget pockets! Patch pockets are a beginner-friendly addition, while kangaroo pockets require careful seam planning. I’ve seen far too many crafters skip the pocket entirely only to realize halfway through row forty-two that they’d much rather have a cozy hiding spot for spare crayons.
If you’re looking for reliable starting points, I always recommend checking out established patterns like the Flax or Little Fox designs. They’re well-documented, sized thoughtfully, and usually include construction notes that don’t leave you guessing. When you lay out the features, think about ease, not just measurements. A child’s hoodie needs about two to four inches of positive ease depending on the season. In winter, you’ll want extra room for layering thick sweaters underneath. In spring, you might stick closer to the actual chest measurement. And please, for the love of all things yarn, never skip the gauge swatch. I remember spending six glorious hours intoning a complex cable pattern only to find out my tension was off by half a stitch. My husband found me curled on the living room floor with a measuring tape wrapped around my thumb like a crooked bracelet. We both laughed until we cried.
What happens if the pattern instructions assume you already know how to read a technical chart? You’ll learn fast enough, and honestly, the learning curve is part of the charm. Grab a highlighter, map out the schematic, and don’t be afraid to circle the rows that confuse you. Do I really need to worry about sleeve caps if I’m making a raglan? Not at all, which is exactly why raglans are so popular for kids. The diagonal seams distribute stress evenly and rarely split during playtime. Is it better to buy a written pattern or follow a free blog tutorial? Both work beautifully, but I tend to gravitate toward self-published designers who test their prints thoroughly. When you choose a pattern, you’re choosing a roadmap. Some roads are straight highways, others are winding mountain passes. I prefer the highways when I’m making birthday gifts, because I know the clock is ticking and the kid wants it worn by Saturday. Pick a design that matches your skill level, maybe even stays slightly below it so you can enjoy the process instead of fighting it. Once you’ve got your pattern pinned down, you can finally turn your attention to the yarn. That’s where we’ll head next, and trust me, picking the right fiber will save you from months of frustrated unraveling later on.
Selecting the Perfect Pattern and Yarn
Picking yarn feels like stepping into a candy store where everything looks delicious but you only have room for three bags. Children’s clothing demands a very specific kind of fiber: something that survives machine washes, resists pilling after a dozen daycare loads, and stays soft against sensitive skin. I’ve learned this the hard way after once knitting a beautiful alpaca blend cardigan for my nephew, only to watch it felt into a stiff, unwearable shell after the first gentle cycle. Now, I swear by superwash merino wool or high-quality acrylic blends. Mercerized cotton is fantastic for spring and summer hoodies because it holds its shape beautifully and drapes without sagging, while a standard worsted weight acrylic gives you that pillowy warmth without the maintenance headaches.
When you’re shopping for yarn, always check the label for yardage and recommended needle size. Most children’s hoodies fall comfortably between fingering and bulky weights, though DK remains my absolute sweet spot. It’s thick enough to knit up quickly but light enough that the finished garment doesn’t weigh down a six-year-old’s shoulders. If you’re eyeing a pattern that calls for a specific gauge, treat it like a promise. I once misread a swatch instruction and used a 3.5mm hook instead of the suggested 4.0mm, which tightened my tension so much that the torso ended up twenty percent smaller than intended. Unraveling forty rows is a humbling experience, but it definitely stuck in my brain.
Top-down construction has completely changed how I approach kids’ garments. You start at the neckband and work your way down, shaping the shoulders and sleeves simultaneously. This means you can try the piece on the child as you go, adjusting length and width without committing to a full torso. Bottom-up methods give you more control over the exact stitch count from the hem upward, which I appreciate when working with complex colorwork or textured panels. Either way, you’ll want to calculate your yardage carefully. A standard child’s hoodie in DK weight usually requires somewhere between 600 and 900 yards, depending on the size and whether you’re adding contrast stripes. I always buy one extra skein, just in case I drop a stitch and end up frogging back to row twelve.
What’s the most forgiving stitch pattern for beginners? Stockinette stitch with a few rows of single crochet (sc) along the edges for stability works wonders. You can also mix in half double crochet (hdc) clusters for texture without complicating the main fabric. How do I prevent the yarn from tangling while carrying colors? Keep your tension loose and wrap the unused strand loosely around the active yarn. Tight wrapping creates ridges that feel like sandpaper under tiny arms. Should I pre-wash my yarn before starting? Absolutely. Blooming and relaxing the fibers beforehand prevents shock and shrinkage later.
I’ve spent countless evenings debating fiber blends, and honestly, the best choice depends on your laundry habits and the child’s skin sensitivity. If you’re knitting for a baby, I lean heavily toward organic cotton or tencel-acrylic mixes. For older kids who tear through clothes, I’ll reach for a sturdy wool-cotton blend or a durable acrylic that bounces back after every tumble dry. Remember that yarn weight labels aren’t strictly standardized across brands, so always cross-reference the recommended gauge. A skein labeled “worsted” from one company might knit up to the same thickness as a “DK” from another. Test a small swatch with your chosen needles, measure it, and adjust accordingly. Your future self will thank you when you’re handing over a garment that fits perfectly and still looks beautiful after a hundred washes.
Sizing and Customization Tips
Measuring a wiggly child for a custom garment feels like trying to catch smoke with a tea towel, but it’s absolutely essential. Grab a soft tape measure and find a quiet moment—perhaps during nap time or after dinner when everyone’s relaxed. Measure across the fullest part of the chest, usually just under the armpits. Note the arm length from the shoulder point down to the wrist bone, and decide how long you want the hoodie body to sit. Most patterns provide a standard sizing chart, but I always add a quarter inch of ease to each measurement to account for growth spurts and favorite sweatshirts worn underneath. For a size 6 child with a 28-inch chest, I typically aim for a 30-inch bust measurement.
Once you have your numbers, compare them to the pattern’s schematic. Don’t panic if your measurements don’t match the chart exactly; knitting patterns are meant to be adapted. If the chest runs narrow, simply increase your stitch count by multiples of the stitch pattern repeat. For a stockinette base, adding four to eight stitches evenly spaced across the row will widen the garment without distorting the drape. Want longer sleeves? Knit past the cuff ribbing until you hit your desired length, then bind off naturally. I remember making a hoodie for a tall ten-year-old and forgetting to extend the sleeve length. She wore it once, looked at me with those deeply disappointed eyes, and said, “It’s cute, but I’m basically a monkey.” We added three inches of ribbing and a matching gusset to fix it, and she hasn’t taken it off since.
Adjusting the Hood and Adding Details
Adjusting the hood requires a bit more geometry, but it’s worth mastering. A properly fitted hood should sit comfortably around the neckline without pulling forward or riding up. If the pattern hood feels too shallow, increase the crown depth by adding short rows or working an extra round of increases. Conversely, if it droops, decrease a few stitches along the back curve. Color changes are another great customization opportunity. You can introduce stripes along the sleeves, use a contrasting color for the hood trim, or add a playful graphic patch. Just remember to track your yarn ends meticulously. I always weave in ends as I go, using a blunt tapestry needle to slip them through the wrong side loops rather than dragging them across the front where they’d create bumps.
How do I know if my ease calculation is correct? Compare your finished garment measurements to a hoodie that already fits the child perfectly. Subtract the new garment’s length and width, then divide by two to see how much extra room exists. Can I change the sleeve style without ruining the pattern? Yes, swapping raglan for set-in sleeves just means you’ll need to sew the underarm seams separately, which actually makes washing easier. What’s the easiest way to add length to the body? Knit more rows in stockinette or a simple garter stitch panel before starting the armhole shaping.
Customization is where your personality shines through. Maybe you want to swap standard ribbing for a twisted stitch for extra stretch, or add contrasting trim using a crochet hook size H/8 to create a neat, scalloped hem. I’ve found that children adore personal touches—a hidden embroidered initial, a stripe that matches their favorite backpack, or a kangaroo pocket lined with fleece. These details take only minutes but make the gift feel completely bespoke. Don’t be afraid to experiment with stitch patterns either. A few rows of treble (tr) stitch along the yoke create lovely vertical lines that flatter growing bodies, while slip stitch (sl st) borders keep everything crisp. When you measure twice and knit once, the final fit becomes so much smoother. You’ll hand over a hoodie that hugs properly, moves with them, and actually gets worn instead of quietly gathering dust in the back of a closet.
Construction Techniques for a Polished Hoodie
Assembling a hoodie might sound intimidating, but once you understand how the pieces connect, it becomes a satisfying puzzle. The hood is usually the trickiest part, mainly because it has to curve perfectly around the neck. I prefer picking up stitches directly along the neckline edge rather than sewing a separate hood on, which eliminates bulk and creates a seamless transition. Start by counting the stitches evenly along the neck curve, then work in rounds, increasing at the front and back markings to shape the crown. Block the hood lightly with steam to help the fibers relax into a smooth dome. I once rushed this step and ended up with a hood that looked like a deflated balloon, so please resist the urge to skip blocking. A quick spray and a good press change everything.
Adding Pockets and Finishing Touches
Adding pockets transforms a basic hoodie into a functional treasure chest. Patch pockets are incredibly straightforward: knit two identical rectangles, finish the edges with a neat row of single crochet (sc) using a 4.0mm hook, and sew them on with a ladder stitch for invisibility. Kangaroo pockets require a bit more planning because you’ll need to cut a horizontal opening in the front panel and attach the pocket bag to the inside. Use a slip stitch (sl st) border along the raw edges to prevent fraying, especially if you’re working with looser weave fabrics. If your child prefers no pockets at all, consider adding decorative topstitching or a subtle texture panel instead. Details matter more than you think.
Finishing touches are what elevate a homemade garment from “crafty” to “ready for school.” Ribbing on the cuffs and hem needs to be snug but not restrictive. I always knit my ribbing one needle size smaller than the main body, then steam block it gently to encourage elasticity. If you’re adding a zipper, choose a nylon coil rather than metal, as it’s lighter and won’t dig into little ribs when they’re hunched over homework. Install it using a zipper foot on your sewing machine, or hand-sew it with a blind stitch for a professional look. Buttons work beautifully for pullover styles, but make sure they’re securely anchored with a shank or a button guard.
How do I keep the hood from curling after washing? Use a stable stitch pattern like reverse stockinette or add a thin line of cable knitting to stabilize the edges. What’s the fastest way to sew seams without puckering? Pin heavily along the seam allowance, then use a mattress stitch to join the fabric invisibly. Should I reinforce high-stress areas like the armholes? Definitely. A few rows of slip stitch (sl st) or a lightweight interfacing tape along the inside will prevent stretching over time.
I’ve learned that patience during construction saves hours of frustration later. When joining sleeves to the body, align the underarm seams carefully and pin every inch before sewing. Use a sturdy thread that matches your yarn weight, and backstitch at the beginning and end of every seam. If you’re working with slippery fibers like silk blends or fine mercerized cotton, place tissue paper underneath your project to prevent shifting. It sounds silly, but it keeps everything aligned. Finishing a hoodie properly takes discipline, but the result is a garment that looks like it came from a boutique. You’ll feel an overwhelming sense of pride when you hand it over, knowing every seam holds together and every detail reflects your care. That’s the magic of handmade clothing.
Troubleshooting Common Hoodie Knitting Problems
Even the most careful knitters run into snags. Gauge issues are probably the number one culprit behind ill-fitting hoodies, and catching them early saves so much heartache. Before you cast on the main body, knit a swatch that matches your pattern’s recommended needle size. Measure it in the dark, honestly, using a ruler and counting stitches over a four-inch square. If you have too many stitches per inch, your fabric will tighten and shrink. Switch to a larger hook or needle, perhaps jumping from a 3.5mm to a 4.0mm, and swatch again. If you have too few, downsize slightly. I once ignored my gauge because I was excited to start, and ended up knitting a torso that barely unzipped. My sister’s cat actually wore it for a week before we realized the mistake. Thankfully, unraveling is part of the process, and each frog teaches you something valuable.
Color changes and stripes can turn a simple hoodie into a tangled mess if you don’t manage tension properly. Carrying yarn up the side of your work is efficient, but it creates ridges that feel uncomfortable against skin. Instead, change colors every two or three rows at the edge, twisting the strands gently behind your work to lock them in place. Weaving in ends seems tedious, but it’s non-negotiable. I use a tapestry needle to follow the path of adjacent stitches, pulling the tail through multiple rows before trimming it close to the fabric. If you skip this step, your hoodie will shed loose fibers every time someone shrugs it on.
Tension inconsistencies often show up as wavy edges or distorted stitch patterns. Keep your hands relaxed and avoid gripping your needles or hooks too tightly. I’ve found that resting my wrists on a cushioned surface while knitting reduces fatigue and produces more even stitches. If you notice puckering along the sides, check your edge stitches. Working the first and last stitch of every row in half double crochet (hdc) or single crochet (sc) keeps borders flat and professional.
What should I do if my stripes start looking jagged? Change colors at the same point in every row, usually at the beginning, and let the unused yarn float loosely behind your work. How do I fix dropped stitches without ripping back? Catch them immediately with a crochet hook, working them back up row by row until the ladder disappears. Is it normal for ribbing to loosen after washing? Yes, but steam blocking and stitching a few hidden anchor points will restore elasticity.
When you hit a roadblock, take a breath and assess the fabric. Most problems have straightforward fixes. A misplaced stitch pattern can be corrected with a few strategic decreases or increases. A bulky seam can be unpicked and reworked using a finer thread. I keep a small repair kit nearby with matching yarn, a darning mushroom, and a sharp pair of thread snips. Having these tools ready prevents minor issues from spiraling into major setbacks. Remember that perfection isn’t the goal; wearability and warmth are. Your child won’t notice if a stripe shifts slightly or if a buttonhole sits a millimeter off-center, but they will feel the comfort and know it was made with love. Trust your instincts, adjust as needed, and keep moving forward.
Key Takeaways
There’s a special kind of magic that happens when you finish a handmade hoodie. You run your hands over the ribbed cuffs, admire the neat seams, and suddenly realize you’ve created something tangible out of nothing but yarn and time. I still keep the first hoodie I ever knitted, even though it’s lost a button and faded slightly in the wash. It sits in my drawer like a memory box, reminding me that craftsmanship is worth the effort. When you knit for someone you care about, you’re giving them more than clothing. You’re offering protection, comfort, and a quiet promise that they’ll always be thought of.
I’ve shared plenty of tips throughout this process, but the real secret lies in patience and practice. Choose a pattern that respects your skill level, measure carefully, and don’t rush the construction phase. Handle yarn weights like DK, worsted, or fingering with intention, and let the fiber choices dictate your finishing techniques. Whether you’re using a 3.5mm hook for tidy edges or switching to a bulky wool for winter warmth, the tools matter less than the care you pour into every stitch. Embrace the mistakes. They’re just stepping stones to better technique. Every tangled end, every uneven row, every frogged section teaches you how to improve.
What’s the best way to store a finished hoodie to preserve its shape? Fold it neatly along the seam lines and store it flat in a breathable cotton bag, away from direct sunlight and moisture. Should I block every hoodie before finishing? Yes, especially if you’re working with natural fibers like wool or cotton. Blocking sets the stitches and evens out any tension quirks. How do I know when a handmade gift is truly complete? When it feels comfortable to hold, when the edges lie flat, and when you genuinely smile looking at it.
I encourage you to share your finished projects with other crafters. Posting photos, swapping stories, and comparing gauge swatches builds a wonderful community of makers who support each other through every loop and pull. The internet is full of patterns, tutorials, and forums, but nothing replaces the satisfaction of creating something entirely your own. So grab your needles, pick a color that sparks joy, and start casting on. Your future self will thank you for the quiet evenings spent in this craft, and the birthday child will cherish a hoodie that literally keeps them warm. Happy knitting, friends. May your tension stay steady and your tea never go cold.
Frequently Asked Questions
How much yarn do I need for a child's hoodie?
For a standard child's hoodie in DK weight, plan on 600 to 900 yards depending on size and contrast stripes. I always buy one extra skein in case I need to frog back a few rows.
What's the best stitch pattern for a beginner hoodie?
Stockinette stitch with a few rows of single crochet (sc) along the edges for stability works wonders. You can also mix in half double crochet (hdc) clusters for texture without complicating the main fabric.
How do I fix a hood that curls after washing?
Use a stable stitch pattern like reverse stockinette or add a thin line of cable knitting to stabilize the edges. Steam blocking also helps relax the fibers into a smooth shape.
Related Posts
Self-Drafted Knit Sweater: Intarsia & Sleeve Adjustments
Learn from a knitter's journey: self-drafting, intarsia, choosing yarn, and adjusting sleeves after completion. Tips for custom-fit sweaters.
AdvancedCrochet Cat Tapestries: 7 Tips for Perfect Pet Portraits
Learn to crochet cat tapestries with custom colors, shapes, and finishing techniques. Get tips for Lady Bagel, Sir Cheddar, and your own feline.
Try Our Free Crochet Tools
Turn Your Photo Into a Crochet Pattern
Upload any photo and our AI generates a pixel-perfect crochet pattern with real yarn color matching in seconds.
Try AeternaCraft Studio Free →Calculate Yarn for Any Resize
Free amigurumi yarn & resizing calculator. Change hook, switch yarn, or scale a whole pattern — instant results with PDF export.
Open the Calculator →