Mastering Mitred Squares: Tips for a 251-Square Coatigan
Learn from a 300-hour mitred square coatigan project. Discover pain points, design tips, and finishing techniques for massive square-based knits.
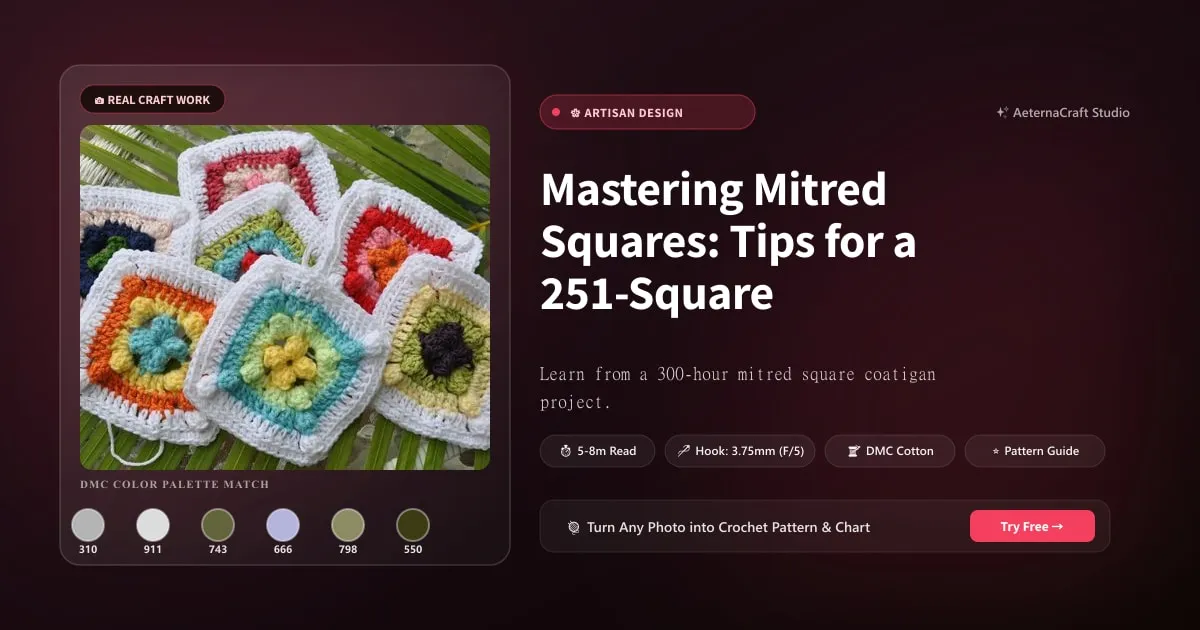
Let’s get one thing straight before you cast on a single stitch: 251 squares is a commitment. It’s not a casual Sunday project; it’s a lifestyle change. When I first sat down to map out my own coatigan, I nearly choked on my Earl Grey. I wasn’t just making a shawl or a blanket; I was building a wearable architectural marvel. The sheer volume of math required to plan this correctly is what separates a finished garment from a pile of regrettable yarn. So, grab your calculator, or better yet, open a spreadsheet, because we are going to do some serious number crunching.
Planning Your Mitred Square Masterpiece
Calculating Square Count and Yarn Requirements
The biggest pain point I see in the community? People assuming they can wing the sizing. Don’t. You need to know exactly how many squares fit into your bust measurement. For a standard oversized coatigan, you’re looking at roughly 15 to 20 squares across the chest width, depending on your square size. I recommend a 4-inch (10 cm) mitred square. That’s manageable but substantial. If you knit your squares larger, you’ll finish faster, but joining 251 giant squares will turn your shoulders into a lump of wool by the end.
Here is the formula I live by: Measure your desired chest width. Divide that by your square width. Multiply that number by two (for front and back panels). Then add the squares for sleeves and collar. For my 251-square beast, I started with a gauge swatch using Drops Nord yarn on 3mm needles. My gauge was perfect at 22 stitches and 30 rows per 4 inches. Once I had that, I did the tedious counting. I aimed for 251 squares to allow for a specific geometric layout.
Yarn estimation is equally brutal. If you use fingering-weight sock yarn, like I did, you’re looking at roughly 400–500 meters per square for a complex colorwork mitre. That means you need about 100,000 meters of yarn. No, I’m not joking. That is why buying in bulk is non-negotiable. You must buy from the same dye lot. Nothing destroys the illusion of a cohesive garment faster than a panel that looks significantly brighter because it was dyed three months apart. Buy 20% extra. Just do it. Your future self, weeping over a missing ball of teal, will thank you.
Choosing Yarn and Needles for Consistency
So, why did I choose sock yarn and 3mm needles? Because I wanted structure. A coatigan needs to hold its shape against wind and wear. Mercerized cotton or high-quality merino wool blends like Drops Nord offer that crisp drape. Acrylic can work, but often feels too floppy for a heavy garment unless you block it aggressively. I stuck with wool because it memory-foams back into shape, which is crucial when you’re wearing this thing for ten years.
Consistency in needle size is your best friend for tension. If you switch from 3.0mm to 3.2mm midway through, your squares will vary. And when you have 251 squares, even a 0.2mm difference compounds into a wavy, uneven edge that makes seaming a nightmare. Use aluminum or nickel-plated needles. They are slick and consistent. Wood grabs too much, metal gets too slippery. Stick to the middle ground.
Designing Without a Pattern: Sizing and Shaping
This is where the artistry comes in. You aren’t following a pattern; you are the pattern. Start by drafting a schematic on graph paper. Plot your bust, waist, and hip measurements. For my coatigan, I wanted a straight silhouette, so I kept the square grid uniform. However, if you want waist shaping, you’ll need to calculate partial squares.
Do you know how hard it is to knit a half-square mitre? Extremely difficult. Instead, I adjusted the layout. I used larger squares for the body and smaller squares for the waist area to cinch it in visually. Or, you can simply leave gaps, but that creates holes in your coat. Not ideal for winter. Think about your sleeve depth. You need enough squares to cover from shoulder to wrist, accounting for the underarm gusset. I reserved an extra 20 squares specifically for the cuffs and button bands, because let’s be honest, you will lose some to tension errors.
Knitting Efficiently: Tips for 251 Squares
Alright, the planning is done. Now comes the grind. Two hundred and fifty-one squares. That is a lot of repetitive motion. If you don’t set up a system, you will burn out before you even finish the tenth square. I’ve been knitting for twenty years, and I still get bored with repetition. Here is how I survived the marathon without losing my mind.
Mastering the Mitred Square Technique
Let’s refresh the basics. A mitred square starts with a center square, usually worked in rounds or rows, expanding outward with increases at the corners. The key is the corner increase. Whether you’re using double crochet (dc) clusters or knit stitches, the corner must remain flexible. If you pull too tight, your square will pucker. If you’re too loose, it’ll look like a sad pancake.
I always recommend working your increases in the gussets — the spaces between the main body and the corners. This creates that beautiful diagonal line characteristic of mitres. Pay close attention to the center decrease or increase. In knitting, this might be a k2tog or p2tog; in crochet, it’s often a chain space. This spot determines the symmetry. Years ago, I made the mistake of tightening the center too much on my first batch, and the resulting squares looked like starbursts rather than squares. Lesson learned: keep your tension relaxed, especially at the center.
Batching and Tracking Your Squares
Do not knit all 251 squares in one go, then stop. You will forget what color went where. I knitted in batches of ten. Ten squares in one colorway, then ten in another. This allowed me to finish distinct sections quickly and gave me a sense of accomplishment.
Tracking is critical. I created a simple Excel sheet. Column A: Square Number (1-251). Column B: Color Code. Column C: Gauge Check (did it measure 4x4 inches?). Column D: Status (Knit, Seamed, Woven in). When I finished a square, I checked it against a template. If it was 3.75 inches, I marked it down. If it was 4.25, I tossed it or blocked it heavily. You need to be ruthless here. Uneven squares make seaming a nightmare. Also, weave in ends as you go. Seriously. Do not leave 500 loose tails to deal with later. Weave them in while you’re watching TV. It takes two minutes per tail. Do it now.
Staying Motivated Through Repetition
How do you stay motivated when you’re on square 150? You distract yourself. Audiobooks were my savior. I listened to thrillers, history documentaries, nothing that required deep concentration. I also knitted with friends, though we mostly just complained about our backs. If you’re solo, challenge yourself. Try to knit one square an hour. Or, vary the stitch pattern. Maybe squares 1-50 are plain stockinette mitres, and 51-100 are textured crosses. Keep your eyes on the prize: that cozy coatigan.
Seaming and Assembly: From Squares to Coatigan
You’ve knit them. You’ve blocked them. Now you have to put them together. This is the phase where most people quit. The sheer size of the project becomes overwhelming. But trust me, once the seams are up, you can see the garment taking shape, and the dopamine hits start flowing again.
Choosing a Seaming Method
You have three main options: mattress stitch, slip-stitch crochet, or backstitch. For mitred squares, I strongly recommend the slip-stitch crochet method (specifically the invisible join or modified slip stitch). Why? Because it’s fast, it creates a flexible seam that doesn’t pucker, and it handles the thickness of the mitred corners beautifully. Mattress stitch is great for flat edges, but mitred corners have bulk. Trying to flatten that with a knitting needle is frustrating. Crochet hooks glide through the loops easily.
Backstitch is too stiff for a coatigan. You want drape. You want movement. A crochet join preserves the elasticity of the original knit or crochet fabric. Plus, it’s quicker. If you’re joining 251 squares, every second counts.
Laying Out Your Squares for Assembly
Never seam blindly. Lay your squares on the floor. Yes, you need a big floor. Or a bed. Arrange them according to your schematic. Pin them down. Take photos from above. Number them with safety pins or tailor’s chalk. I labeled mine 1-251 in the top left corner of each square. This helps if you need to adjust the layout later. Did you notice the colors are too dark on the left? Move a few around. It’s easier to rearrange pinned squares than unpicked seams.
If your squares are slightly different sizes, this is the time to decide how to absorb the discrepancy. Use a smaller hook size for the seam on the larger squares to tighten them up. Or, gently stretch the smaller ones during assembly. Blocking played a huge role here. I blocked every single square to exactly 4 inches by 4 inches before starting. This uniformity saved me hours of frustration.
Seaming Order and Techniques for Large Projects
Don’t try to join all 251 squares into one giant piece at once. It will weigh a ton and tear itself apart. Join them in strips first. For example, join rows 1-5 horizontally, then rows 6-10. Once you have five long strips, join those strips vertically. This manages the bulk. You’re handling a strip instead of 50 individual squares.
Work from the inside out. Start with the center panel, then add the side panels, then the sleeves. Keep your seams aligned. If a corner sticks out, clip it. If a seam puckers, check your tension. Remember to weave in ends after seaming, not before. It’s easier to hide tails within the seam allowance.
Finishing Touches: Cuffs, Hems, and Button Bands
A raw-edged coatigan looks unfinished, like a dog ate your homework. The edges define the garment. This is where you add the professional polish.
Picking Up Stitches for Edges
Pick up stitches evenly along the front opening and hem. For a mitred square edge, the curve can be tricky. I found that picking up one stitch for every two rows along the curve works best. Along straight edges, pick up one stitch per row. Use a hook one or two sizes smaller than your main needles to prevent gaping. If you see holes forming at the corners, pick up an extra stitch there to fill the gap. It’s better to have too many stitches (which you can bind off loosely) than too few (which leaves ugly gaps).
Knitting Cuffs and Hem
For the cuffs and hem, I used a 1x1 ribbing in a contrasting color, or the same color if you want subtlety. Ribbing adds structure and prevents rolling. Knit it about 2-3 inches wide for the hem, and 4 inches for the cuffs. If you’re worried about the hem flaring out, use a smaller needle for the ribbing. This creates a tighter, more defined edge that sits nicely against your hips.
Button Bands and Buttonholes
Button bands are essential for a coatigan. Pick up stitches along the front opening. Knit in a stockinette or seed stitch border, about 1 inch wide. For buttonholes, I used the wrapped turn method or simple yarn-over decreases. Space them evenly. Mark the placement with a safety pin before you knit. Sew buttons on the opposite side. Use a shank button or sew with extra thread to create a little gap, allowing the thick seam of the squares to pass through easily. Nothing is worse than a button that pops off every time you sit down.
Troubleshooting Common Issues
Even with the best planning, things go wrong. That’s part of the craft. Here is how to handle the inevitable disasters.
Dealing with Tension Discrepancies
If a square is too big, block it aggressively. Wet it, pin it down hard, and let it dry. If it’s too small, you might have to skip it and use a slightly larger square in its place, or adjust the surrounding squares. Don’t force a mismatched square into the seam. It will cause distortion. Sometimes, the best solution is to use a decorative stitch or a crochet round to frame the square, hiding the irregularity.
Avoiding Yarn Tangles and Knots
Managing multiple balls of sock yarn is a juggling act. Use yarn bowls or bobbins to keep the strands organized. If you get a knot, splice it. Wet the ends of synthetic yarn and rub them together until they fuse. For natural wool, felt the ends together. Never just tie a knot; it will bulge and ruin the drape.
Preventing and Fixing Mistakes in Mitred Squares
Forgot a decrease? Your square will ripple. If it’s minor, block it out. If it’s major, frog (rip back) the last few rows. Use a lifeline! Thread a scrap of contrasting yarn through the live stitches every 10 rows. If you mess up later, you can rip back to the lifeline without losing your place. It’s a lifesaver for a 251-square project. Twisted stitches? Catch them as you go. Don’t let them accumulate.
Remember, perfection is the enemy of done. Your coatigan doesn’t need to be museum-quality. It needs to be warm, wearable, and uniquely yours. Now, go forth and knit.
Frequently Asked Questions
How many squares do I need for a mitred square coatigan?
For a standard oversized coatigan, you'll need roughly 15 to 20 squares across the chest width, depending on your square size. My 251-square beast required careful planning with a 4-inch (10 cm) mitred square. Multiply your chest width by the number of squares per inch, then double for front and back panels, plus sleeves and collar.
What yarn and needle size work best for mitred squares?
I recommend fingering-weight sock yarn on 3mm needles for structure and drape. Mercerized cotton or high-quality merino wool blends like Drops Nord offer crisp drape that holds shape. Avoid acrylic unless you block aggressively. Consistency in needle size is critical—even a 0.2mm difference across 251 squares creates wavy edges.
How do I seam mitred squares together without puckering?
Use the slip-stitch crochet method (invisible join) for flexible, non-puckering seams. Join squares in strips first—horizontal rows, then vertical strips—to manage bulk. Block every square to exactly 4x4 inches before assembly. Use a smaller hook for larger squares to tighten them up, and gently stretch smaller ones during seaming.
Related Posts
Excel to Sweater: Plot Knitting Patterns Like a Pro
Design custom sweaters using Excel—from plotting patterns to flawless execution. Tips for creating unique, personalized knits with grid-based planning.
AdvancedSelf-Drafted Knit Sweater: Intarsia & Sleeve Adjustments
Learn from a knitter's journey: self-drafting, intarsia, choosing yarn, and adjusting sleeves after completion. Tips for custom-fit sweaters.
Try Our Free Crochet Tools
Turn Your Photo Into a Crochet Pattern
Upload any photo and our AI generates a pixel-perfect crochet pattern with real yarn color matching in seconds.
Try AeternaCraft Studio Free →Calculate Yarn for Any Resize
Free amigurumi yarn & resizing calculator. Change hook, switch yarn, or scale a whole pattern — instant results with PDF export.
Open the Calculator →