Mosaic Crochet Tarot Blanket: Tips & Pattern Guide
Learn from a Reddit user's experience with the Crocheter Tarot mosaic blanket. Get tips on written vs chart patterns, yarn choices, and time management.
Understanding Mosaic Crochet Patterns: Written vs Charts
Let’s get one thing straight before we even pull a skein off the shelf: mosaic crochet is not your average round-robin single crochet project. It’s colorwork where you don’t carry floats, but you do deal with two active stitches, and if you aren’t paying attention, you will lose your mind. I’ve been crocheting long enough to remember when “intarsia” was a scary word, but mosaic? That’s a whole new beast. And the very first battle you’ll face isn’t tension; it’s format. Do you read words, or do you decipher squares?
The Case for Written Patterns
When I saw that Reddit thread about the Crocheter Tarot mosaic blanket, I had to smile. The user chose the written pattern over the chart, and honestly? I respect that choice immensely. Don’t get me wrong, charts are beautiful. They are artistic little maps of joy. But for a queen-sized blanket involving dozens of colors and complex tarot symbolism, a chart can feel like trying to read a map while driving blindfolded.
Written patterns are your best friend if you like structure. When I first tried mosaic, I relied heavily on the step-by-step instructions. “Row 1: Sc in first st, hdc in next…” it’s rhythmic. It’s predictable. The benefit here is that you don’t have to constantly zoom in and out on a screen or squint at a tiny PDF. You just read. However, the drawback is length. Let me tell you, reading 200 rows of text can make your eyes glaze over faster than a bowl of cheap ice cream. It’s also incredibly easy to lose your place. One minute you’re on row 45, and the next, you’re on row 46, wondering why your edges look like they’ve been dragged through a hedge.
My advice? If you choose written, annotate it. I keep a highlighter next to my yarn basket. Every time I finish a section, I highlight that paragraph. It sounds silly, but it keeps you grounded.
When to Lean on Charts
Now, when should you use charts? Charts are fantastic if you are an experienced mosaic crocheter who understands the rhythm of the stitches instinctively. If you know that a white square means “slip stitch” and a colored square means “half double crochet,” the chart gives you a bird’s-eye view of the design. It helps you see the big picture—the symmetry, the repeats, the overall flow of the Tarot cards.
For complex designs, charts prevent those dreaded “where am I?” moments because you can visually scan ahead. If you see a block of purple coming up three rows away, you can mentally prepare your color change. But be warned: charts require focus. If you are tired, stressed, or just generally scatterbrained (which, as a crocheter, I assume you often are), a chart can lead to missed stitches or incorrect color placements.
Bridging the Gap
Here is the secret weapon that many beginners miss: use both. Seriously. I print the chart and pin it up on my wall where I can see the general shape. Then, I keep the written pattern on my lap for the nitty-gritty details of each row. It’s like having a GPS and a paper map simultaneously.
Also, don’t be afraid to mark your chart. If you are working from a digital file, use a PDF editor or even physical sticky notes to cover rows you’ve finished. This reduces visual clutter. The goal is to reduce cognitive load so you can enjoy the craft rather than fighting the instructions. Remember, mosaic crochet is about relaxation, not solving a cryptographic puzzle at 2 AM.
Yarn Selection for Large Mosaic Projects
If there is one thing that can make or break a large mosaic blanket, it is the yarn. I’ve seen blankets collapse under their own weight, and I’ve seen them look crisp and professional. The difference usually boils down to two things: fiber content and color contrast. Let’s talk about how to choose your materials so you don’t end up with a tangled mess or a blanket that looks like a muddy puddle.
Weight and Fiber Matters
For a project this size, you need yarn that offers good stitch definition but also has some drape. A bulky yarn might finish the project in record time, but mosaic patterns rely on the distinction between the slipped stitches and the worked stitches. If the yarn is too thick, everything blurs together.
I recommend a Worsted Weight (Category 4) yarn. Specifically, I love using a 100% acrylic like Lion Brand I Love This Yarn. Why? Because it’s soft, it’s affordable (crucial for a queen-sized blanket!), and it holds its shape beautifully. Acrylic doesn’t felt or shrink in the wash, which is a relief when you’re dealing with a massive object.
However, if you want luxury, consider a blend. A cotton-acrylic blend gives you the stitch definition of cotton with the softness of acrylic. But beware of pure cotton for large blankets unless you are a pro at tension control. Cotton has no stretch, meaning if your tension varies even slightly, your blanket will ripple and warp. Years ago, I attempted a massive cotton mosaic throw, and let’s just say it ended up looking like a crumpled napkin. Stick to wool blends or acrylics for easier handling.
The Art of Color Contrast
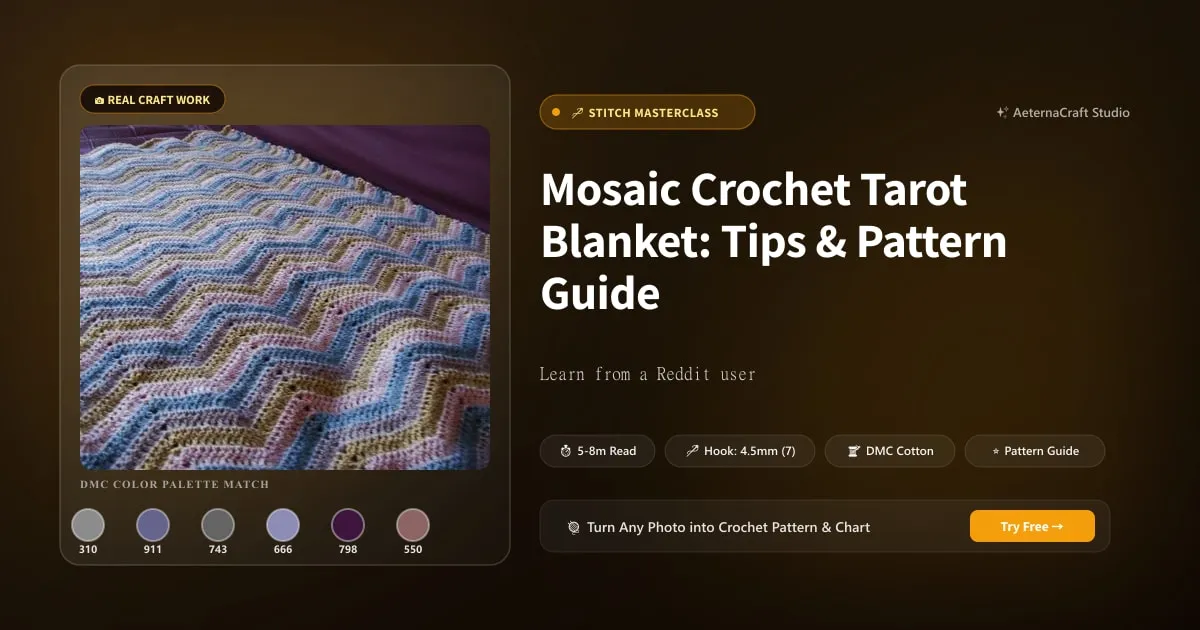
Mosaic crochet lives and dies by contrast. If you choose colors that are too similar, the pattern disappears. Think back to that Crocheter Tarot blanket. The user mentioned using purple and amethyst tones. While beautiful, these are analogous colors. Did the pattern show up? Surprisingly well, because of the texture shift between the slip stitch and the hdc, but it required a deliberate choice in lighting during photos.
For your own project, test your yarns against each other. Hold the background color next to the accent color. Can you clearly distinguish the shape of the symbol? If not, switch to a higher contrast pair. A deep navy background with bright yellow stitches pops; a light gray background with pale pink stitches vanishes.
Also, consider the “floats.” Even though mosaic crochet doesn’t carry yarn across the back, the way the colors interact affects the visual weight. Dark colors tend to recede, while light colors advance. Use this to your advantage to create depth in your tarot imagery.
Yardage and Purchasing Power
A queen-sized blanket is no joke. We are talking about thousands of yards. Before you buy anything, calculate your gauge. Swatch! I know, I hate swatching too. But skipping it is how you end up with a blanket that’s too small for your bed.
Buy at least 10% extra yarn. Dye lots vary. If you run out and buy a new skein, it might be a shade darker or lighter, creating a visible band across your blanket. I once made the mistake of buying two balls of “variegated” yarn that were technically the same dye lot but showed slight differences in saturation. It looked like a barcode on my scarf. Avoid that pain.
Where to shop? Online retailers often have better prices for large quantities, and you can return leftovers easily if you stick to the same brand. Also, check for sales on acrylics. Since you won’t be wearing this against your skin every day (it’s a bedspread, after all), saving money on high-end merino wool is perfectly acceptable.
Time Management for a 6-Week Crochet Project
Six weeks. That’s a tight deadline for a queen-sized mosaic blanket if you’re working part-time, but entirely doable if you’re strategic. I’ve tackled large projects before, and the key isn’t speed; it’s consistency. If you try to binge-crochet for 12 hours a day, you’ll quit by day three. Instead, let’s build a sustainable rhythm.
Breaking It Down
First, look at your pattern. How many rows are there? Let’s say the Crocheter Tarot pattern has roughly 400 rows. Over 42 days (6 weeks), that’s about 9-10 rows per day. Sounds scary? It’s not. Ten rows of worsted weight mosaic crochet, done carefully, takes about 45 minutes to an hour.
Set a daily goal that feels manageable. Maybe you commit to 30 minutes every morning with your coffee. Or perhaps you tackle 15 rows every evening while watching TV. The specific number matters less than the habit. Consistency beats intensity every time.
When I started my first large tapestry crochet piece, I tried to do “marathon sessions.” I’d sit for four hours, get sore, make errors, and then hate the craft. Now? I work in chunks. Small wins accumulate. Seeing ten rows completed daily gives you a psychological boost that keeps you motivated.
Staying Motivated Through Repetition
Mosaic crochet is repetitive. Single crochet, slip stitch. Single crochet, slip stitch. It’s meditative, yes, but it can also become monotonous. How do you stay engaged?
- Audio Entertainment: Audiobooks are my best friend in the crochet studio. Listening to a compelling story distracts your brain from the manual labor, making the time fly.
- Variety of Projects: Have a second, smaller project on the go. If you hit a tricky junction in the main blanket, switch to a simple sc dishcloth for ten minutes to reset your hands.
- Community: Join a Crochet-Along (CAL). Even if it’s an online forum, seeing others post their progress photos creates a sense of shared journey. You’re not alone in that pile of yarn; you’re part of a collective effort.
Tracking Progress
Use a row counter. Yes, there are apps for this, but I still prefer a physical clicker or a simple tally sheet taped to my wall. There is something satisfying about crossing off a day on a calendar.
If you fall behind, don’t panic. Life happens. Maybe you got sick, or maybe you just didn’t feel like it. Adjust your timeline. If you need five more weeks, take them. Rushing leads to mistakes, and fixing mistakes in mosaic crochet is a nightmare because you often have to rip back several rows to correct a color error. Better to take your time and do it right than to rush and regret it later.
Displaying Your Queen-Sized Mosaic Blanket
So, you’ve finished. Congratulations! You now hold a mountain of yarn that was once just loose strands. But a queen-sized blanket is awkward. It’s heavy, it’s wide, and it doesn’t fit in a standard photo frame. How do you display it proudly without it looking like a pile of laundry on your bed?
Photographing the Big Picture
Photographing large textiles is tricky. Lighting is everything. Natural light is your best ally. Try shooting near a large window on an overcast day for soft, even illumination. Avoid direct sunlight, which creates harsh shadows and blows out the details of your mosaic stitches.
Use a tripod if possible. Hand-holding a phone while trying to capture a 90-inch wide object is difficult. Set your camera on a timer or use a Bluetooth shutter remote. Shoot from directly above if you can get a ladder or stand on a chair, or shoot from the foot of the bed looking up to capture the full length.
The Reddit user mentioned posting a photo of the blanket on a queen bed. This is a great reference point. It shows scale. Ensure the blanket is spread out smoothly. Any wrinkles distort the geometric precision of mosaic crochet.
Blocking for Perfection
Before you display it, you must block it. Mosaic crochet tends to curl or distort slightly due to the different stitch heights (sc vs sl st vs hdc). Blocking evens this out.
For acrylic yarn, steam blocking is your friend. Use a steam iron held just above the fabric—do not touch the iron to the yarn, or you will melt it and ruin your masterpiece. The steam relaxes the fibers, allowing the stitches to settle into their proper places. Lay the blanket flat on a large surface, pin it out gently if needed, and apply the steam evenly.
Allow it to dry completely before moving it. This process can take 24-48 hours. Patience pays off in a flat, professional-looking finish.
Creative Display Ideas
Once it’s dry and beautiful, how do you show it off?
- The Bedspread: Obviously. Fold the top third down to create a decorative border effect. This highlights the intricate pattern at the head of the bed.
- Wall Hanging: If your wall space allows, a queen blanket makes a stunning art piece. Use curtain rods or discreet pins along the top edge. Ensure your walls can support the weight.
- Draped Over Furniture: A couch arm or a chair back can showcase the drape and texture. This is especially effective if you used high-contrast colors.
- Throw Pigeonhole: Create a dedicated space in your living room where the blanket is always displayed, perhaps on a bench at the foot of a guest bed.
Remember, this blanket is a labor of love. Treat it with respect. Don’t let the dog chew on it (we all know that’s going to happen eventually, but for now, keep it safe). Enjoy the warmth and the pride of creation.
Troubleshooting Common Mosaic Crochet Issues
Even with perfect planning, things go wrong. I’ve dropped stitches, misread colors, and tangled my yarn more times than I care to admit. But in mosaic crochet, errors are more visible than in plain stitch projects because of the color changes. Here is how to handle the inevitable hiccups without losing your sanity.
Fixing Tension Problems
Tension is the silent killer of mosaic crochet. If your tension is too tight, the blanket will pucker. If it’s too loose, the fabric will sag.
Common issue: “Zippering.” This happens when the slipped stitches are tighter than the worked stitches, causing the fabric to curve along the row line. Solution: Relax your grip on the yarn. Try a larger hook size if the fabric feels stiff. Some crocheters find that switching from a standard hook to a slightly larger one (e.g., from 4.0mm to 4.5mm) helps loosen the fabric just enough for better drape.
Another issue is uneven edges. The sides often tighten up. To combat this, make sure to work the first and last stitches of every row consistently. Some patterns suggest adding a chain-1 at the beginning of rows to maintain height. Test this in your swatch!
Correcting Mistakes in the Pattern
Did you miss a color change? Did you accidentally work a dc instead of an sl st? In mosaic crochet, catching these early is vital.
Small errors can often be fixed by picking out the stitches (frogging) just back to the error. Because mosaic uses two active loops, you might be able to untangle a few rows without unraveling the whole thing. Use a tapestry needle to gently lift the loops.
However, if you’ve gone several rows too far, you may need to rip back significantly. Don’t be afraid to frog. It’s better to lose an hour of work now than to have a visible blemish in your final blanket. I once spent three hours unpicking a row because I didn’t notice a color swap until the next section started. It was frustrating, but the result was worth it.
Dealing with Pattern Errors
Sometimes, the designer makes a mistake. It happens. If a pattern doesn’t seem to align or the math doesn’t add up, stop and analyze. Is it a typo? Or did you misunderstand the instruction?
Check online forums or the designer’s social media. For a pattern like Crocheter Tarot, there might be a Ravelry group or a Facebook community where other crocheters are working it. You are not alone. If you find an error, document it. Take photos of the problematic section and compare it to the chart.
If you need help, reach out to the designer. Most independent designers, like those at Nerd Princess Designs or similar creators, appreciate feedback and are often happy to clarify instructions. They want you to succeed. Just be polite and specific in your query. “Row 45 seems to result in a gap at the edge; here is a photo of my work.” That kind of clear communication helps everyone.
And finally, remember that no project is perfect. A tiny mistake in a corner won’t ruin the beauty of your labor. Embrace the flaws as part of the handmade journey. Now, grab your hook, steep your tea, and let’s get crocheting.
Frequently Asked Questions
Should I use a written pattern or a chart for a mosaic crochet blanket?
It depends on your experience and preference. Written patterns offer step-by-step structure and are great for beginners, but they can be long and easy to lose your place. Charts give a bird's-eye view of the design and help you see symmetry and repeats, but they require focus and familiarity with mosaic stitch symbols. My secret weapon is using both: print the chart for the big picture and keep the written pattern for row-by-row details.
What yarn is best for a large mosaic crochet blanket?
For a queen-sized mosaic blanket, I recommend worsted weight (Category 4) yarn, specifically 100% acrylic like Lion Brand *I Love This Yarn*. It's soft, affordable, holds its shape, and won't felt or shrink. If you want luxury, a cotton-acrylic blend offers good stitch definition, but avoid pure cotton unless you have perfect tension—it has no stretch and can warp. Color contrast is critical: test your background and accent yarns together to ensure the pattern pops.
How do I manage time for a 6-week mosaic crochet project?
Break the pattern into daily goals. For a 400-row blanket over 42 days, aim for 9-10 rows per day, which takes about 45 minutes to an hour. Consistency beats intensity: work in 30-minute chunks daily rather than marathon sessions. Use a row counter, join a Crochet-Along for motivation, and don't panic if you fall behind—adjust your timeline. Rushing leads to mistakes that are hard to fix in mosaic crochet.
Related Posts
Finish Large Crochet Projects Without Burning Out
Learn strategies for managing oversized crochet projects, including planning, time management, and motivation tips to avoid project fatigue.
TroubleshootingFinish a Baby Blanket Fast: 5 Time-Saving Tips
Struggling to finish a baby blanket before the baby arrives? Learn time-saving tips, pattern choices, and mindset shifts to complete your gift on time.
Try Our Free Crochet Tools
Turn Your Photo Into a Crochet Pattern
Upload any photo and our AI generates a pixel-perfect crochet pattern with real yarn color matching in seconds.
Try AeternaCraft Studio Free →Calculate Yarn for Any Resize
Free amigurumi yarn & resizing calculator. Change hook, switch yarn, or scale a whole pattern — instant results with PDF export.
Open the Calculator →